Choosing a chandelier is not only about style. It is about proportion, sightlines, comfort, and the way light moves across the table. This guide explains how to match chandeliers with different dining table shapes using practical design principles. A round table often suits a centered, rounded fixture. A rectangular table may need a longer chandelier or two smaller pendants. Oval tables require softer visual balance, while square tables can support bold geometric forms.
Sally Storey, an internationally respected lighting designer and author, describes lighting as “the jewellery of the home.” Her observation is useful here. A chandelier should enhance the dining room without overwhelming its furniture. Leave enough clearance for conversation and comfortable eye contact. As a working guideline, place the fixture about 30 to 36 inches above the tabletop, then adjust it for ceiling height and personal comfort.
The following sections examine scale, width, suspension height, finish, and bulb temperature for each table shape. You will see concrete examples, such as a matte-black linear chandelier above a walnut table or a frosted-glass globe above a compact round table. These choices are not rigid rules. Some rooms resist perfect formulas. A narrow dining area may need a smaller fixture than expected. A dramatic ceiling may welcome more volume. Careful observation matters. Measure the table, study the surrounding furniture, and test the light before making a final decision. Good matching feels intentional, but never forced.
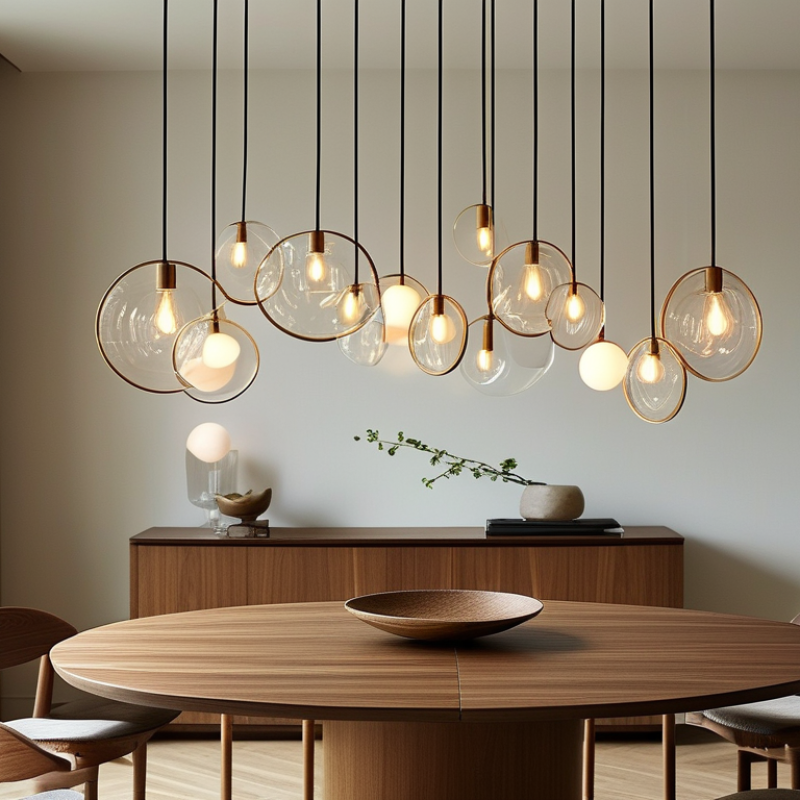
Before choosing a chandelier, identify your dining table’s shape, dimensions, and seating capacity. Measure the tabletop, not just the room.
A rectangular table usually needs a linear chandelier or a long fixture with balanced proportions. For a 72-inch table, choose a fixture roughly 36 to 48 inches wide. Round and square tables often suit circular or compact chandeliers. The fixture should echo the table’s geometry without copying it too literally.
Count every regular seat. A six-seat table needs different visual weight from a twelve-seat table. Larger tables may require two matching fixtures, especially when one chandelier leaves dark areas at each end. Keep the bottom of the chandelier about 30 to 36 inches above the tabletop. This range supports conversation and reduces glare for seated guests.
I have found that measurements alone do not create comfort. A narrow rectangular table can look crowded beneath a wide chandelier, even when the numbers seem correct. Ceiling height, chair backs, and sightlines matter too. Stand at the table before installation. Ask someone to sit opposite you. If the fixture blocks eye contact, reconsider its height or scale.
Leave walking space around the table. A beautiful chandelier becomes impractical when guests brush against it. Also check whether the table expands for special occasions. Its extended length may need a longer fixture or additional lighting. Small mistakes happen. Careful testing helps reveal them early.
Identify your dining table shape, size, and seating capacity before choosing a chandelier. The recommended fixture diameter or width is approximately 50–67% of the table’s shorter dimension.
These planning examples use common dining-table dimensions and typical seating capacities. For rectangular and oval tables, a linear chandelier may also be selected at approximately 50–67% of the table length, while round and square tables generally work best with a centered circular or square fixture.
A chandelier should echo the dining table’s shape without copying it too literally. Measure the table before choosing the fixture. A useful proportion is a chandelier diameter about one-half to two-thirds of the table’s width. Leave roughly 30 to 36 inches between the tabletop and the lowest crystal or shade. This clearance protects sightlines and keeps the light comfortable.
Round tables usually pair well with circular or softly tiered chandeliers. Their centered forms create visual balance, especially in compact dining areas. Choose a fixture with a gentle curve rather than sharp extensions. Square tables can support square, drum-shaped, or geometric chandeliers. The fixture should feel substantial but not wider than the tabletop. I once used a round fixture above a square table, and the result looked surprisingly calm. Still, the room’s architecture mattered more than expected.
Rectangular tables benefit from linear chandeliers or two smaller fixtures arranged along the centerline. Match the chandelier’s length to about half or two-thirds of the table, leaving space at both ends. Oval tables work beautifully with elongated oval fixtures or narrow linear forms. Rounded edges soften the arrangement and prevent a rigid appearance. In rooms with low ceilings, a flush or semi-flush design may work better than a hanging cluster. Check the fixture’s weight and ceiling support before installation. A qualified electrician should handle wiring and mounting. Proportion rules help, but they are not absolute. Furniture scale, ceiling height, and personal comfort can change the answer.
How to Match Chandeliers with Different Dining Table Shapes?
Choose the Proper Chandelier Dimensions for Balanced Proportion
A chandelier should echo the dining table’s geometry, not compete with it. For a round table, choose a fixture about one-half to two-thirds of the tabletop diameter. A 48-inch table suits a chandelier measuring roughly 24 to 32 inches wide. Leave visual breathing room. For rectangular tables, select a chandelier around half to two-thirds of the table’s length. A 72-inch table often works with a 36- to 48-inch fixture. Linear designs usually fit better than compact round forms.
Hang the fixture 30 to 36 inches above the tabletop, measured from the table surface to the chandelier’s lowest point. This range supports conversation and reduces glare, though ceiling height can change the result. The U.S. Department of Energy reports that LED lighting uses at least 75% less energy than incandescent lighting and lasts up to 25 times longer. Efficient bulbs can reduce heat above the table, especially with larger fixtures. Use warm light near 2700K to 3000K for comfortable meals. Too bright feels clinical. I once preferred a wider fixture, but it visually crowded a narrow table. Proportion is easy to underestimate.
| Dining Table Shape | Recommended Chandelier Shape | Suggested Chandelier Dimensions | Recommended Table Size | Ideal Hanging Position | Proportion and Design Guidance |
|---|---|---|---|---|---|
| Round | Round, globe, drum, or compact multi-light chandelier | Diameter: approximately 45–60 cm for a 90–120 cm table | Diameter: approximately 90–120 cm | Center the chandelier directly over the middle of the table | A circular fixture reinforces the table’s geometry. Keep the chandelier diameter about one-half to two-thirds of the table diameter for a balanced visual relationship. |
| Square | Square, round, or symmetrical geometric chandelier | Width or diameter: approximately 50–70 cm for a 90–120 cm table | Width and length: approximately 90–120 cm | Align the fixture with the table’s central axis | Use a fixture with a strong, centered silhouette. A round chandelier can soften a square table, while a square fixture creates a more coordinated architectural look. |
| Rectangular | Linear chandelier, elongated rectangular fixture, or two aligned pendants | Length: approximately 60–75% of the table length; width: 25–40 cm | Length: approximately 150–240 cm; width: 80–100 cm | Center the fixture lengthwise and widthwise over the table | The chandelier should follow the table’s long axis without extending beyond the tabletop. For a long table, two or more pendants can distribute light more evenly than one small fixture. |
| Oval | Linear, oval, elliptical, or softly curved chandelier | Length: approximately 60–75% of the table length; width: 25–40 cm | Length: approximately 150–240 cm; width: 80–100 cm | Hang along the centerline of the table | Choose rounded edges or an elongated profile to echo the tabletop. Avoid a very angular fixture unless the room already contains strong geometric details. |
| Boat-Shaped or Narrow-End Table | Linear chandelier, narrow oval fixture, or a sequence of small pendants | Length: approximately 50–70% of the table length; width: 20–35 cm | Length: approximately 180–260 cm; width: 80–100 cm | Center it lengthwise, leaving clear space at both ends | A slim fixture preserves the table’s tapered profile and avoids visual heaviness near the narrower ends. Multiple pendants should be evenly spaced. |
| Extendable Rectangular Table | Adjustable linear chandelier or multiple pendants | Fixture length: approximately 50–70% of the table’s usual extended length | Common extended length: approximately 180–300 cm | Position the fixture over the table’s primary center point | Select a design that remains proportional in both everyday and extended configurations. Multiple pendants provide flexibility when the table length changes frequently. |
| Small Bistro or Compact Table | Single pendant, small globe, or mini drum chandelier | Diameter or width: approximately 35–50 cm | Diameter or width: approximately 70–100 cm | Center the fixture over the tabletop | Keep the fixture visually light so it does not overwhelm the dining area. A smaller diameter with sufficient light output is usually more appropriate than a large decorative cluster. |
General installation guidelines: For a standard dining room ceiling, position the bottom of the chandelier approximately 75–90 cm above the tabletop. Maintain clear sightlines across the table, and verify the fixture’s total weight, electrical requirements, and ceiling support before installation.
The right hanging height helps a chandelier illuminate dinner without blocking conversation. I usually begin 30 to 36 inches above the tabletop for an eight-foot ceiling. Measure from the table surface to the chandelier’s lowest point, not to its electrical canopy. For taller ceilings, add about three inches for each extra foot. This guideline works well, but every room deserves a real-world check.
A rectangular table often needs a longer chandelier or a linear fixture centered along its length. Keep the fixture high enough for seated guests to see across the table clearly. With a round table, a centered chandelier can hang slightly lower because the sightline is more consistent from every seat. An oval table falls between these choices. Its extended ends may need a wider fixture or multiple light sources. Leave practical clearance around the chair backs and table edges.
I often use painter’s tape or a temporary cardboard mock-up before installation. Sit at several places, then ask someone to walk around the room. The fixture should feel present, not intrusive. For an eight-foot ceiling, dropping below 30 inches can create awkward eye contact and bump risks. Raising it too far may flatten the dining area’s atmosphere. I once preferred a higher installation, but evening glare exposed the mistake. Dimmers, warm bulbs, and a canopy suited to the ceiling angle can refine the result. Some tables also shift position over time, so the visual center may need a second measurement.
A chandelier should echo the dining table’s geometry, but its style must also serve the room. Round tables pair naturally with circular or drum-shaped fixtures. Rectangular tables usually need linear chandeliers or multiple pendants for even coverage. An oval table can accept either form, which makes it forgiving. Too much symmetry can still feel predictable.
Material coordination matters. Aged metal adds warmth to walnut, while polished metal suits glass, stone, or lacquered surfaces. Avoid matching every finish exactly. A small contrast often gives the room more depth. In practice, I compare the chandelier with cabinet handles, curtain rods, and chair frames under evening light. Finishes can look surprisingly different after sunset.
Lighting performance deserves more attention than appearance. The U.S. Department of Energy reports that LED lighting uses at least 75% less energy and lasts up to 25 times longer than incandescent lighting. Choose a dimmable LED source with a high color-rendering index, preferably 90 or above, so food and wood tones remain believable. Warm white light around 2700–3000K usually supports a relaxed dinner atmosphere. Keep the fixture high enough for clear sightlines, but not so high that the table loses intimacy. A useful starting point is 30–36 inches above the tabletop, although ceiling height and fixture scale can change that rule. I sometimes favor a slightly smaller chandelier after testing the sightline. Bigger is not always better.
: Choose a fixture about half to two-thirds of the tabletop’s diameter. A 48-inch table usually suits a 24- to 32-inch chandelier. Leave breathing room around the fixture.
Linear fixtures usually work best because they follow the table’s long geometry. For a 72-inch table, choose a fixture about 36 to 48 inches long. Compact round fixtures may look visually lost.
Keep the lowest point about 30 to 36 inches above the tabletop. Measure from the table surface, not the ceiling canopy. This height supports conversation and limits glare.
Yes. Add roughly three inches for every extra foot above an eight-foot ceiling. Treat this as a starting point, not a fixed rule. Measure twice.
An oval table needs a middle-ground approach between round and rectangular designs. Use a wider fixture or several light sources for its extended ends. Check whether the ends still receive enough light.
Mark the proposed size with painter’s tape or cut a cardboard outline. Sit in several chairs and ask someone to walk around the room. The fixture should feel noticeable, not intrusive.
Warm light around 2700K to 3000K usually creates a relaxed dining atmosphere. Very bright light can make the room feel clinical. A dimmer adds useful control.
Efficient bulbs generally produce less heat and use less energy than traditional incandescent bulbs. This matters with larger fixtures hanging close to diners. I once chose a wider fixture, but it crowded a narrow table.
Learning how to match chandeliers with different dining table shapes begins with assessing the table’s form, dimensions, and seating capacity. Round tables often pair well with circular or softly curved chandeliers, while square tables benefit from fixtures with balanced, geometric proportions. Rectangular tables typically look best with elongated chandeliers or a linear arrangement, and oval tables can accommodate rounded or gently extended designs. The chandelier should be sized to complement the tabletop without overwhelming it, leaving enough visual space for comfortable movement and conversation.
Hanging height is equally important: the fixture should provide effective illumination while keeping sightlines clear across the table. Consider the room’s ceiling height and the diners’ comfort when positioning it. Finally, coordinate the chandelier’s style, materials, finish, and light quality with the dining room’s overall design. A well-matched fixture can unify the space, create a welcoming atmosphere, and provide balanced lighting for everyday meals and special gatherings.
Sienna Lights